

Vishal Kothari
For those who don’t know about WordPress, it is a very popular Content Management System. It started as a publishing platform in 2004. Currently it can be used to develop any kind of website or web application with the help of various plugins & themes it provides. Around 25% of the websites on Internet use WordPress.
Why is website load speed important?
It is said that your website load speed has a huge impact on user behavior. A delay of a couple of seconds impacts user’s satisfaction level and also forces the user to leave your website.
Google also includes website speed as one of the factors in it’s ranking algorithm. This means your website could show up a couple of spots higher on the search results page if it loads fast.
This will be a 4-part series. Roughly each post will cover 3 to 4 different points which you can implement on your WordPress website to increase it’s loading speed.
1. Optimize Images
There are several plugins available to optimize your website images. The one we are going to use today is WP Smush.
You can install the plugin either by downloading from the above mentioned link & then going to Plugins -> Add New -> Upload. Or you can go to Plugins -> Add New and enter “WP Smush” in the search box.
Once the plugin is installed, it appears under Media -> WP Smush. You can optimize your current images on your website from here.
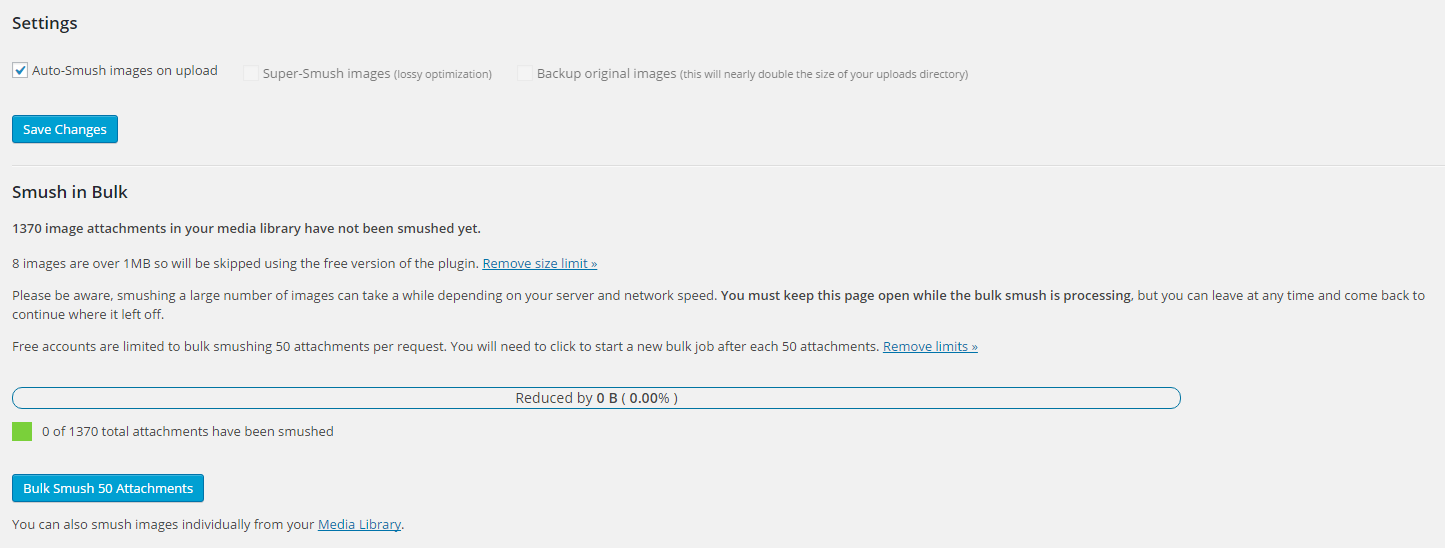
Once installed, you will see some (annoying) upgrade notices too in your admin. But we will focus on the free version.
The free version only allows to optimize 50 images at a time. Also it will NOT optimize images that are bigger then 1 MB. Once you click on “Smush Images”, it will take a batch of 50 images & start optimizing them.
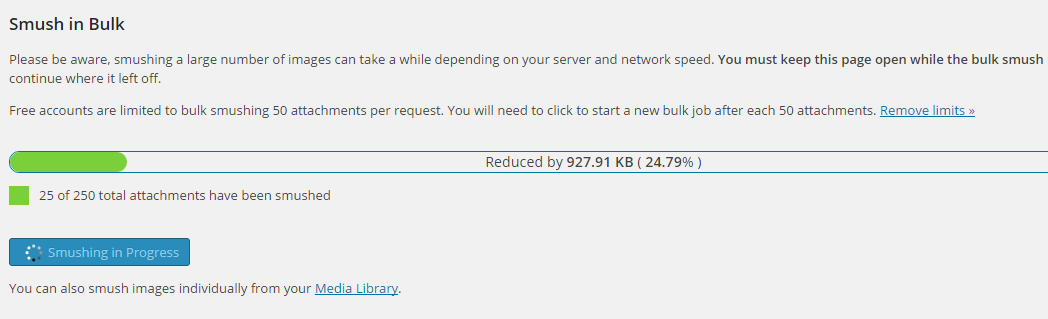
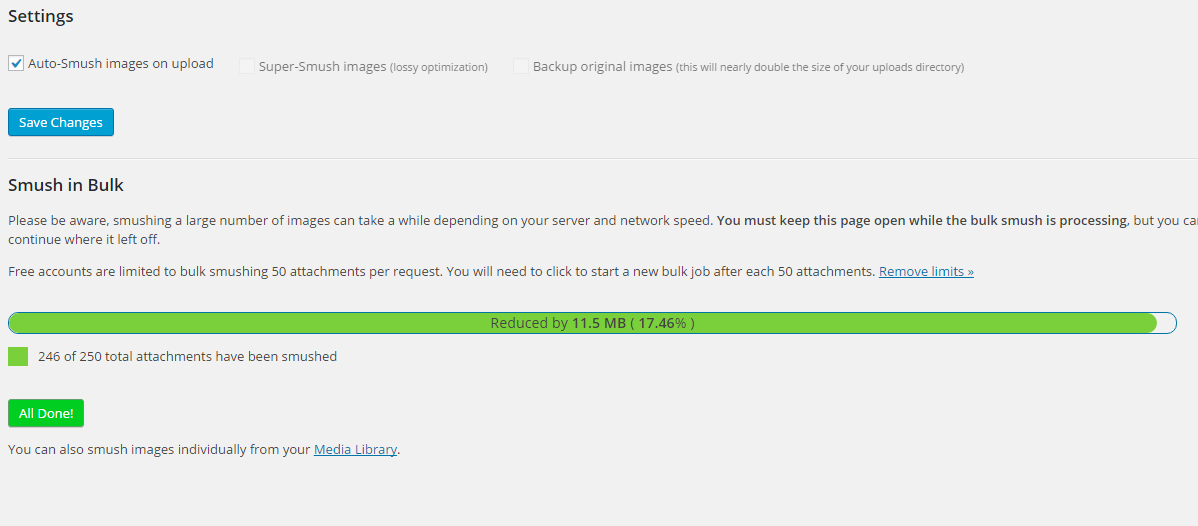
I was able to reduce my image sizes by about 17%.
The free version of WP Smush uses advanced lossless compression techniques. The WP Smush Pro plugin also allows progressive JPEGs to improve page load time of website.
You can also optimize images from the “Media -> Library” page. For some images, I was able to get as much as 80% reduction in size.


WP Smush is not the only plugin available for image optimization in WordPress. It would be interesting to see how does it compare with other image optimization plugins in WordPress. RIOT (Radical Image Optimization Tool) is another excellent tool that optimizes images with no constraints on its usage.
2. Stop pingbacks & trackbacks
Pingback or Trackback is an automatic notification sent when a link has been created to a person’s blog post from an external website, allowing a reciprocal link to that website to be created.
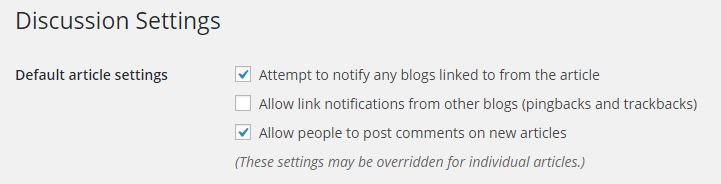
By default, WordPress does interact with other blogs that can handle pingbacks & trackbacks.
Which means every time another blog or website mentions your site’s link, it notifies your site. This, in turn, updates the post data.
If you turn this setting off, then the back link will still be present on the other blog. It will only make sure WordPress stops listening to any such requests when a link of your site gets mentioned on any other site.
For this, you need to turn off “Allow link notifications from other blogs (pingbacks and trackbacks)” in Settings -> Discussion page.
3. Reduce revisions stored
Every time you press “Save Draft” or “Publish” or “Update”, each revision is stored as a separate entry in the WordPress database.
For example, I have saved this post about 5 times until now. The database contains all those 5 revisions. This may not be absolutely needed. What I may need is the last 2 or 3 revisions, but I don’t want to store all 10 revisions if I save a post or page 10 times.
With each revision stored in the database, a new record is added. This increases the table size enormously.
WordPress does not provide any option to limit the number of revisions that should be stored. But by using the plugin Revision Control, we can keep post revisions to a limit like 2 or 3.
This will ensure that your database size stays small.
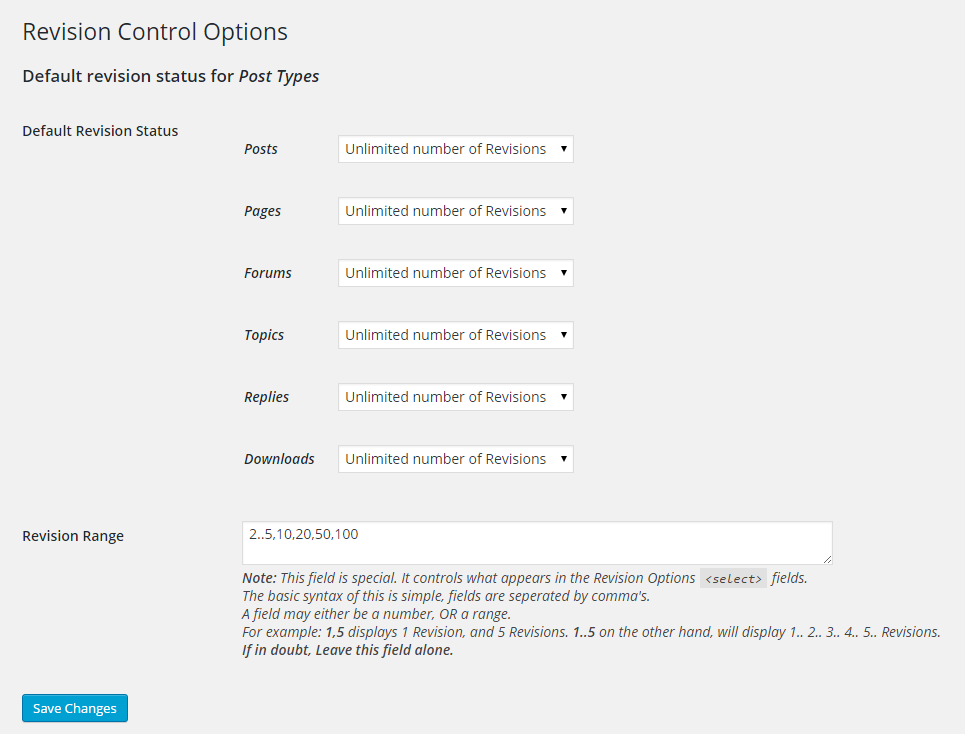
Once the Revision Control plugin is installed & activated, you can change the revision settings from Settings -> Revisions.
It shows Posts, Pages and all other custom post types that you may have on your blog. In my case, the custom post types are Forums, Topics, Replies & Downloads.
By default, there is no limit set. This is how it appears when you visit that settings page for the first time.
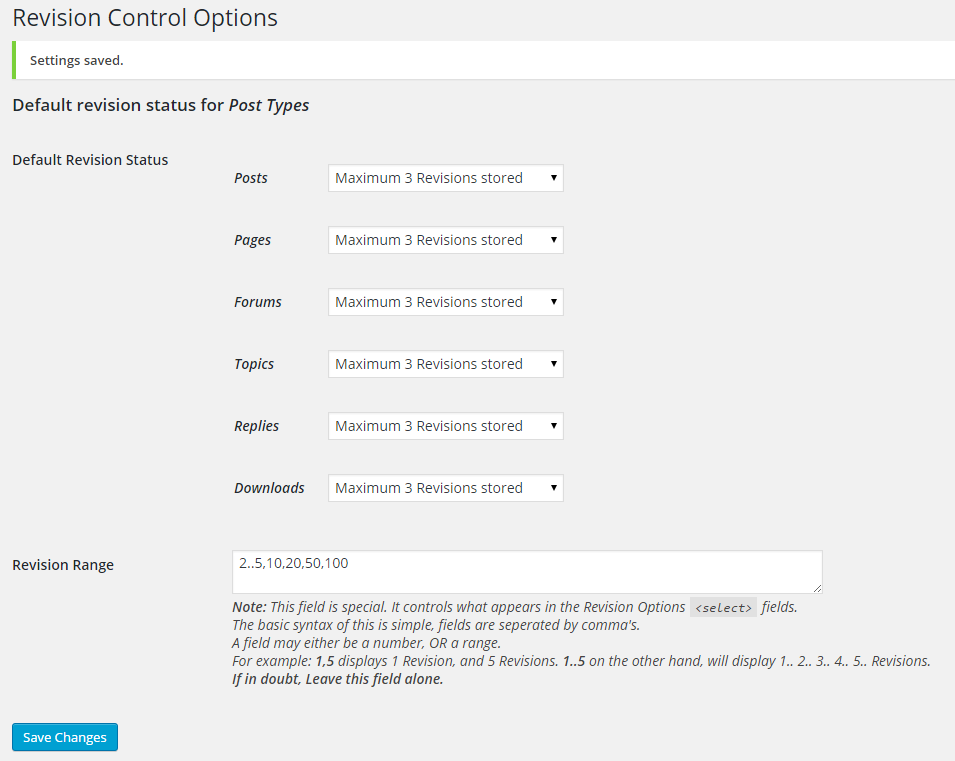
I changed it to 3 revisions for my Posts, Pages as well as all custom post types.
Conclusion
Using these simple 3 techniques, I was able to reduce my image sizes by about 15%, I was able to setup my blog to not look for any pingbacks and I also ensured that I do not store each & every revision of my posts & pages. Seems a lot of improvement. 
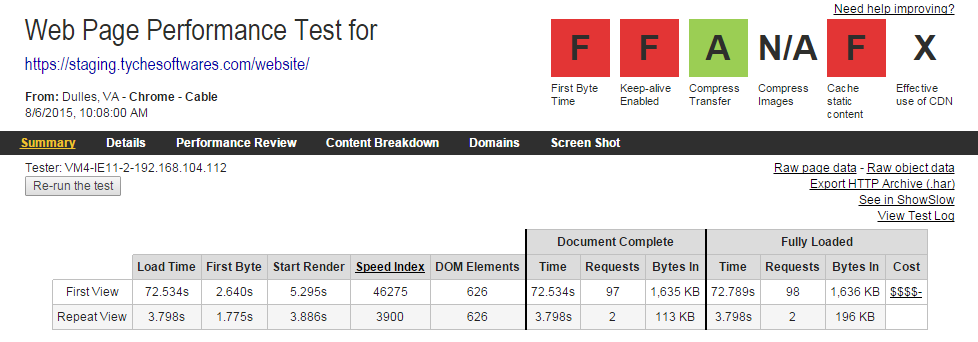
Here is the WebPageTest.org results before & after applying the above 3 techniques:
Before:
After:
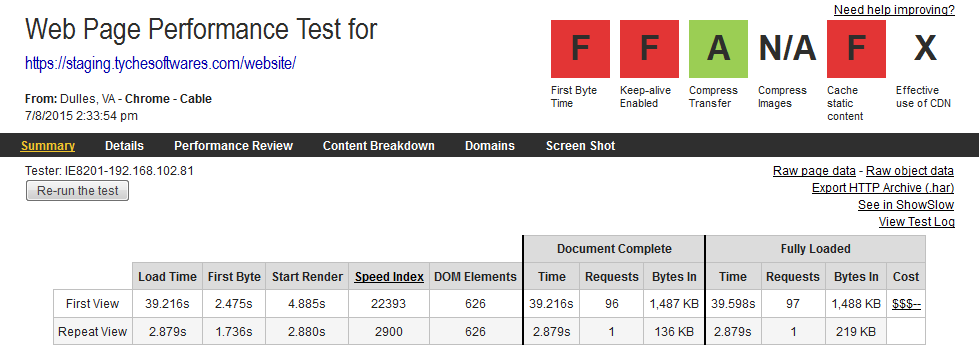
Result:
We can see that the “Bytes in” has reduced by 148KB, which is a significant improvement. The time taken to load after the optimization has also reduced by 33 seconds. Though this varies on your internet speed, but it should generally be on the lower side compared to what it was before the optimization.
It is not necessary for you to be a developer to implement any of these. You can surely try to do these on a staging site first, notice the output & then replicate on your live website.
What’s your experience with optimizing your WordPress sites for fast loading?
- How to speed up WordPress sites? – Part 4 - October 25, 2015
- How to speed up WordPress sites? – Part 3 - October 20, 2015
- How to speed up WordPress sites? – Part 2 - August 31, 2015


")


